Monday, August 8, 2011

Berry Buttermilk Cake

Berries.  Berries.  And more berries.  It’s summer.  And I can’t stop eating berries.  Blueberries, strawberries, blackberries, raspberries, and the list goes on…  This cake is a perfect summer berry cake.   
It’s not your typical light, summery cake.  This cake is dense, sweet, and a perfect combination with some light, fresh berries.  

 Blackberry/Raspberry Buttermilk Cake:
(Adapted from From Bon Appetit Magazine)

-3/4 cup unsalted butter, at room temperature (if you can’t find unsalted, use regular butter and omit the salt later in the recipe)
-2 1/3 cups cake flour
-2 ½ cups fresh blackberries or raspberries (about 10oz)
-3 tbsp + 1 1/3 cups sugar
-1 ½ tsp baking powder
-3/4 tsp salt
-1/2 tsp baking soda
-3 eggs
-2 generous tsps vanilla extract (‘cuz vanilla makes EVERYTHING taste better!)
-1 cup buttermilk (don’t have buttermilk?  No worries.  Pour out one cup of regular milk, and add 1 tbsp lemon juice.  Let the milk sit for 5 mins before you use it, Ta Da!)
-powdered sugar for dusting

Preheat your oven to 350 degrees.  Spray a 9” or 10” spring form pan with cooking spray.  Line the bottom of the pan with parchment paper (or wax paper).  Spray the top of the wax paper with cooking spray, also.  Arrange berries in a single layer on the bottom of the pan, and sprinkle with the 3 tablespoons of sugar.  Set aside.
 Sift the cake flour, baking powder, salt, and baking soda into a medium sized mixing bowl.  Using an electric mixture, beat the butter and remaining sugar in a large mixing bowl on medium-high speed for 2 minutes, until the mixture turns a pale yellow and is light and fluffy.  Add the eggs, one at a time, beating well after each addition.  Next, add the vanilla, mixing thoroughly.  Reduce the speed to low, and slowly, alternately add the flour mixture and buttermilk, beating until just incorporated.  Pour the batter over the berries, smoothing the top.  Bake the cake until it is a deep golden brown, and the cake bounces bake when pressed gently with fingertips, about 1 hour to 1 hour 15 mins.  Allow the cake to cool on a wire rack for 15 minutes.  After the cake has cooled a bit, run a butter-knife along the edge of the pan to loosen the cake.  Remove the pan sides.  Invert the cake onto a wire rack or serving plate.  Gently, remove the pan bottom and peel off the parchment.  Let the cake cool completely.  Dust the top with powdered sugar.   


Viola!  Berry Buttermilk Cake.  Enjoy!


Saturday, July 30, 2011

Strawberry Summer Cake

Ahh, Summer.  Sun burns, late nights, BBQing, sprinklers, and fresh, sweet fruit. 
This cake screams summer.  Its packed with naturally sweet and delicious fresh strawberries, and has a light, creamy texture.  Perfect after a BBQed dinner, watching the hot sun go down on a hazy summer day.  My cousins made this delicious cake at our family reunion earlier this month, and after only one bite I absolutely NEEDED to have the recipe.  My Aunt told me it was from another blogger: Smitten Kitchen.  And now I have another blog I am hooked on.
I hope you all are having a delicious summer.  Enjoy it with a slice of this cake, and some vanilla ice cream. 

Strawberry Summer Cake:
(adapted from Smitten Kitchen)

-6 tbsp butter
-1 1/2 cups flour
-1 1/2 tsp baking powder
-1/2 tsp salt
-1 cup plus 2 tbsp sugar
-1 egg
-1/2 cup milk
-1 tsp vanilla extract
-1 pound strawberries, hulled and halved

Preheat oven to 350 degrees.  Spray a 9" or 10" spring form pan with cooking spray (I actually used this enormous pie pan I have, but I recommend the spring form pan- easier to remove and no risk of the cake rising over the edges!).
In a small mixing bowl, combine the flour, baking powder, and salt.  In another large mixing bowl, beat the butter and 1 cup sugar with an electric mixer for a few minutes, until the mixture is pale yellow and fluffy.  Beat in the egg, milk, and vanilla until just combined.  Next, add the dry mixture in small increments, until just incorporated.
Pour the cake batter into your prepared pan.  Place the strawberries on top of the cake batter, cut side down. Sprinkle the remaining 2 tbsp sugar on top of the strawberries.
 Bake for 10 minutes at 350 degrees, then reduce the oven temperature to 325, and bake for another 50-60 minutes, until a toothpick inserted in the middle comes out clean (there will be some strawberry juices on the toothpick- thats ok.  But you don't want runny cake batter on it!).
Let the cake cool in the pan completely.  Serve with vanilla ice cream or sprinkle the top with powdered sugar.  Ta Da!

Wednesday, July 6, 2011

Cinnamon Raisin Swirl Bread


This bread…..wow.  Just wow.  It’s buttery.  It’s sweet.  It’s cinnamony.  It’s raisiny.  It’s perfect.  It made for a great breakfast while on vacation for my family reunion this past weekend.   
 See, when I'm with my immediate family, I look adopted.  I look nothing like my parents or siblings.  They all have (or in the case of my dad, HAD) jet black or dark, dark brown hair.  And I'm the freak with red/ginger hair. But......
Look!  I'm not the only "Ginger" when I'm with my extended family!  In fact, there are so many of us, we had to take a "Ginger Group Shot."  According to Mike, it was the "Soul-less Group Shot."  Regardless if I have a soul or not, it was awesome to see ALL of my family.

And regardless of the color of my hair, everyone loved the bread.  My family so carefully rationed the one loaf I had out for breakfast one morning….  Until I showed them that I had a SECOND loaf hiding in the cupboard.  Then they tore it up!  It was great plain, toasted, smeared with butter or cream cheese.  And it’s easy to make.  No really.  Easy.  You don’t even need a fancy mixer.  You can just use a regular hand mixer! 

So go make it.  Now.

Cinnamon Raisin Swirl Bread:  makes 2 loaves
(Adapted from the Better Homes and Gardens Cookbook)

-5 cups all purpose flour
-1 tbsp active dry yeast
-1 1/3 cups milk
-4 tbsp sugar
-3 tbsp butter/margarine
-1/2 tsp salt
-2 eggs
-1 cup raisins
-3/4 cup sugar
-1 heaping tbsp cinnamon
-3 tbsp butter/margarine, melted

In a large mixing bowl stir together 2 cups flour and the yeast.  
 In a large, microwave safe bowl (I actually used a large glass measuring cup), combine the milk, sugar, butter, and salt.  Microwave on high, in increments of 30 seconds, stirring between each increment, until the mixture reaches 120-130 degrees (I used a digital kitchen thermometer to measure the temp.  You can “feel” the temp of the mixture too- it should be very warm to the touch- but NOT boiling).  
 Add the milk mixture to the dry ingredients along with the eggs.  Beat with an electric mixer (use the regular beaters or use a dough hook) until all of the ingredients are evenly incorporated (scrape the bowl constantly).  
 Next, beat the mixture on high for 3 minutes.  Using a wooden spoon (or continue to use an electric mixture with a dough hook), stir in the remaining flour.  Lastly, stir or beat in the raisins.
Turn the dough out onto a lightly floured surface.  
 Make believe the dough is that Charlie Horse in your calf you can never work out, and knead the dough for 5-7 minutes, adding more flour as needed to prevent the dough from sticking (build up those biceps, you Hulk Hogan you).  You should end up with a smooth, elastic dough.  
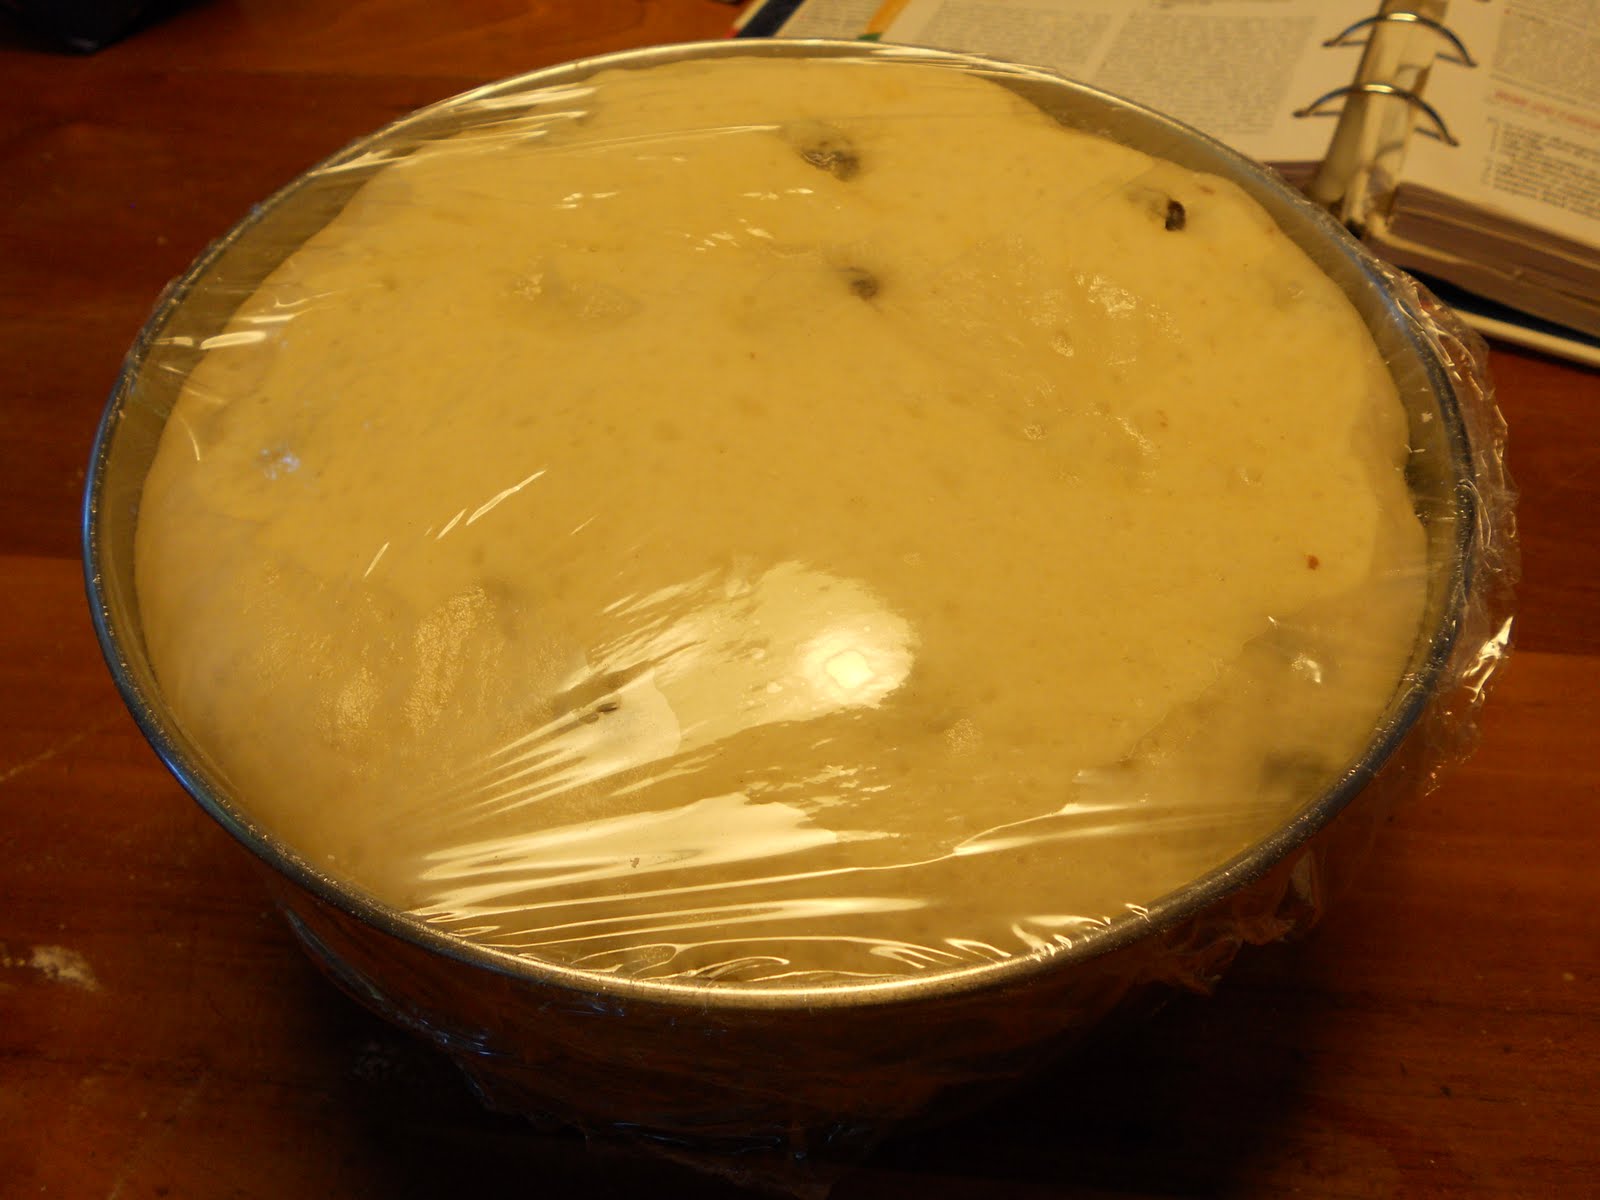
 Shape the dough into a ball, and place in a large, greased bowl.  Spray the top of the dough with cooking spray, cover the bowl with plastic wrap, and allow the dough to rise in a warm, dry place for an hour or so, or until the dough has doubled in size (I recommend putting the dough in the oven with just the light on- works like a charm every time!).

 After the dough has risen, pretend it’s now that jerk who cut you off on the highway this morning, and punch it down (remember- baking is therapeutic for me!!!!!).  Carefully take the dough out of the bowl and place it on a lightly floured surface.  Divide the dough in half.  Cover the dough and let it rest for about 10 minutes. 
While the dough is resting, spray 2 standard loaf pans with cooking spray.  Set them aside.  Mix the cinnamon and sugar together in a small bowl.  Set that aside too.  Melt the butter or margarine.  Yep, that also gets set aside.
On a floured work surface, roll one piece of dough into a small 12x7 inch rectangle.  
 Brush the top of the dough with half of the melted butter.  Then sprinkle the dough with half of the cinnamon sugar.  Use your hand/fingers to push the cinnamon sugar all the way to the edges, making it even and patting it in.
Next, starting at the SHORT end of the rectangle, roll the dough up.  
 Pinch the seam shut, gently tuck the ends of the dough under, and place your newly made loaf into one of the loaf pans, SEAM SIDE DOWN (otherwise the seam will split open while it bakes and it won’t come out right).  Repeat with the other half of the dough.  Place the loaves in a warm, dry place to rise for 30 minutes.  
 Preheat the oven to 375 degrees.  Smear some soft or melted butter on top of each of the loaves.  Bake for 25-30 mins, until the tops of the loaves are golden brown and the bread makes a hollow sound when you tap the top of it.  If the bread is getting too brown and doesn’t sound hollow, cover it with aluminum foil to prevent it from burning while it finishes baking.  Allow the bread to cool almost completely (the pan should be just barely warm to the touch), then remove from the pan.  You have to resist diving in right out of the oven, otherwise the loaf will fall apart (it still tastes great, but it causes a mess in the kitchen).  
 Slice and enjoy however you like it!

Banana Rum Coconut Cake


Cake is good.  Cake is great.  Cake goes with any and every occasion.  And when you are taking your brand new, KitchenAid Artisan stand mixer for its maiden voyage, you need to make something epic.  Enter:  Banana Rum Coconut Cake.  It’s so moist.  It’s so flavorful.  It tastes like banana bread and a cake had too many Pina Coladas and created this delicious child.  It was the perfect cake to make.  
 Banana Rum Coconut Cake:
-2 1/3 cups all-purpose flour
-1 tsp baking powder
-1/2 tsp baking soda
-1/4 tsp salt
-1 1/2 sticks (12 tbsp) butter or margarine
-2/3 cup sugar
-1/3 cup firmly packed brown sugar
-1 tsp vanilla
-3 eggs
-1 1/2 cups smashed banana
-2/3 cup milk
-2 tbsp rum
-1 recipe vanilla frosting (make your own or use a store bought jar- I ended up needing to use a store bought one since there was no room in our fridge and my go-to recipe requires it to be refridgerated)
-2 2/3 cups (about 1 [7oz] package), sweetened shredded coconut

Spray 2 (I got fancy and did 3) 8 or 9 inch round cake pans with cooking spray.  Set aside.  In a large bowl, combine the flour, baking powder, baking soda, and salt.  In a separate, large mixing bowl, combine the butter, sugar, and vanilla.  Beat the butter mixture on medium speed for 3-4 minutes, or until lightened in color and well whipped.  
Next, beat in the eggs.  Beat for 1-2 more minutes, to make sure the eggs are well incorporated.
In another bowl smash the bananas with the milk and rum.
 On low speed, add the flour mixture and banana mixture alternately.  Once all of the ingredients have been incorporated, beat the batter on high for 3 minutes. 
Divide the batter evenly into your prepared cake pans.  Bake for 20-30 minutes (depending on how many pans you are making), or until the cake has risen, is a deep golden brown, and feels firm when pressed with your fingertips.
Beautiful!  Let the cakes cool completely.  When you are ready to assemble the cake, smear a small amount of frosting on whatever dish you are going to use, and place your first layer ontop of it.  This little bit of frosting will keep it anchored to the dish, so the cake won't get pushed around while you frost it.  Smear a 1/4 inch layer of frosting over the entire cake, stacking the layers on top of each other.  
Now for the coconut (you may want to place a layer of wax paper over your work surface- this part gets super messy!): using your hands, grab a handful of coconut, and press it into the frosting.  Whatever coconut falls off, simply scoop up and press into an open section of frosting.  Cover the entire cake.  When you are finished, gently pull the wax paper from around your cake.
Ta-Da!  Look at that gorgeous, delicious cake.  Its amazing.  Now stop drooling over the picture and MAKE IT!  :)

Sunday, June 26, 2011

One Blessed RedHead


I am one truly blessed redhead.  I am honored.  I am so appreciative.  And I have THE BEST coworkers anyone could ask for.

So here’s the background information:  I have been working for BOCES for 2 years now.  And sadly, I must say good-bye, for a little while.  This summer and fall I have to wrap up my graduate program in speech-pathology, so I will be taking a leave of absence from BOCES until December.  While I am excited to finally have my Master’s degree, I am also saddened to leave BOCES.  I love working with the students there, and my coworkers make my job that much better.  When some days are more difficult than others, it’s my coworkers who help get me through it.  And in return, I bake.  Or cook.  Or sometimes both.  Baking and cooking have been a sort of “therapy” for me, and I loved sharing everything I make with my amazing coworkers.  Nothing gave me more happiness than to see my coworkers eating one of the cookies I made or grabbing lunch that I had cooked for them.  And they loved it too!  I would always hear “Your cookies were the only thing that got me through today!”  or “I had some of that chili, and it made my week!”  What my coworkers didn’t know, was that everything I made was my way of saying, “Thank you for supporting me when my student was having a difficult time,” or “I’m so glad we have become friends this year.  You are awesome.  So I’m making you some brownies.” 

On Thursday, I got what was probably the best surprise of my life.  My coworkers gave me a "Good Luck" card, where they wrote the sweetest messages ever, wishing me luck while I finish my Master’s.  And they also gave me a gift.  A large gift...... to Williams-Sonoma!!!!  When I opened the box it came in I was:
a.)    Shocked
b.)    Speech-less
c.)     Trying really hard not to cry in front of everyone
d.)    So excited I wanted to scream, and dance, and give everyone a big hug

I think I held the tears back pretty well though, and gave EVERYONE a big hug.  And I was on Cloud 9 the rest of the day!  And then the next day, my coworkers did it again.  They gave me another gift (I mean seriously, they are AWESOME!!!!!!!!).  I was given a beautiful apron, with this amazing logo stitched into it:

 I FEEL SO OFFICIAL!!!!! 

I love it.  So now when I bake, or cook, I get to look official in my professional “RedHead and The Kitchen” apron. 

So let’s get back to that other gift.  The one to Williams-Sonoma.  Oh.  Yes.  Everytime I was in Eastview Mall, and I walked past that store, I would drool.  I want EVERYTHING in that store.  Me shopping in that store is like a little kid in a candy shop.  I’m in heaven!  I had never purchased anything from there…. Until now!  On Friday I went and picked out something I have always wanted.  A KitchenAid stand mixer.  
Now, those suckers are EXPENSIVE, so I dreamed I would only get one if I got married and put it on my registry and begged my family to get it.  But not anymore.  Now I have one that is all my own.  My dream came true!
 
Hello gorgeous.  We are going to have lots of adventures together.  Lots of delicious, yummy adventures.  
  
So thank you, everyone at BOCES.  You have made me one very, very happy RedHead.  Thank you, thank you, thank you.  You don’t know how much I love each of you.  And somehow, I will find a way to get some goodies to you despite my absence. ;)

Thank you.  Thank you.  Thank you.  Thank you.  Thank you.  Thank you.  Thank you.  Thank you.  Thank you.  Thank you.  Thank you.  Thank you. x infinity.